The Art of Image Dithering - A Unique Visual Effect Worth Trying Out
One day while using X (or twitter), I came across this post by @bbssppllvv and first came across this Dithering effect and thought it was sooo cool. I was fascinated as I have been an enjoyer of Visual things — from Drawing to Design and Frontend, and thought of diving deeper into this effect. I went through wikipedia pages, dithering websites, obscure pdfs and more, and loved the vast amount of Algorithms and the different patterns that can be created.
So What is Image Dithering?
Simply, It is a method to represent an image with a fewer/limited set of colors. It involves a process called quantization, which is basically rounding pixel values to their closest value in a smaller set of values. In addition, there are some algorithms that involve error diffusion, which is the process of spreading errors (difference between original and quantized pixel value) to nearby pixels.
It’s a way to create an illusion of smoothness with a smaller set of colors by strategically adding noise or “dots”. Other than being a really cool visual effect generator, there are other use cases as well.
Some Use Cases of Image Dithering
It’s earlier use cases were in newspapers, comic books, and other printed media, where dithering would be applied to images using just black dots (and white using absence of black). This would smoothly simulate gray shades even though printing presses only supported black ink. Comic books and other color printing worked similarly, but to simulate more shades of color than the limited palette printing presses had. from lifewire


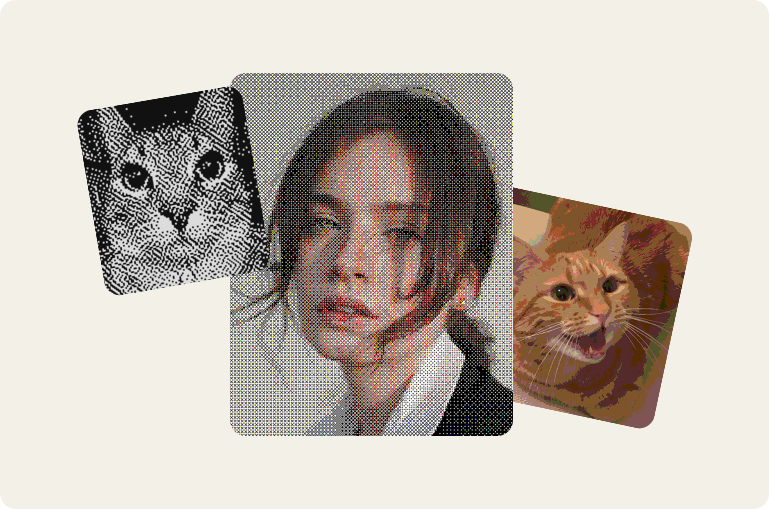
Original Image from Pexels Grayscaled (first), Dithered image (second) simulating grayscale with black & white pixels.
The first image above uses actual gray shades while the dithered image, which also looks grayscale, uses only black and white pixels!

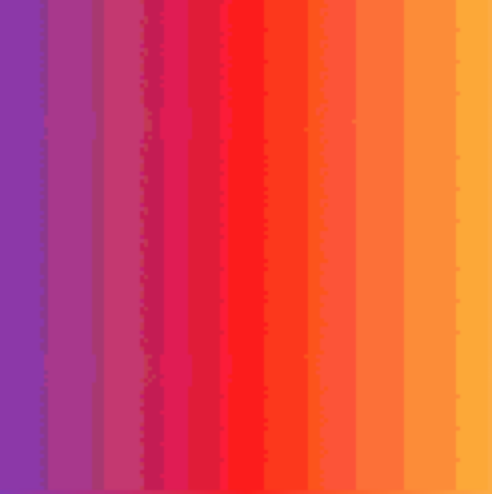
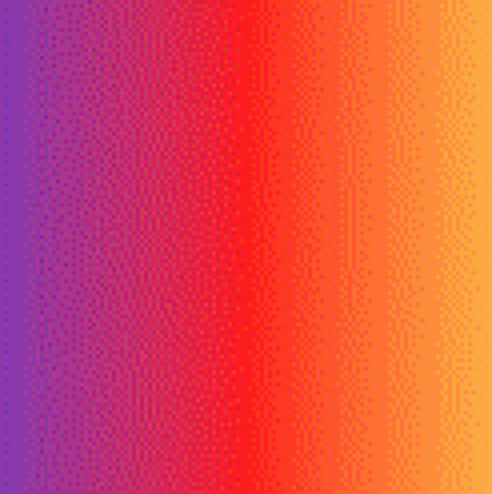
Original Image (first). Quantized Image with 10 color values (second) and Dithered Image with 10 color values (third).
Simply quantizing or mapping pixels to smaller set of colors can create unsmooth bands (middle image above), applying dither smooths it out using the same limited set of colors (right-side image)
After some initial exploration, I started playing around by implementing a basic version of some algorithms on codepen.io and thus began my journey of understanding some of them and building Ditherplay (you can check it out after reading this blog).
Some Common Dithering Algos and how they work
Let’s now explore how some of these algorithms work, it’s also helpful if you want to implement them yourself. I will focus on two main categories:
Error Diffusion Algorithms
Here, we first quantize the colors and round them to the closest value. Then we take the difference between the original and the quantized value, which is the error and spread it to nearby pixels. There are different algorithms to spread these errors, let’s go through some of them:
Floyd-Steinberg Algorithm
-> It traverses from left to right in the image and pushes the quant error to the neighbouring four pixels like shown below:
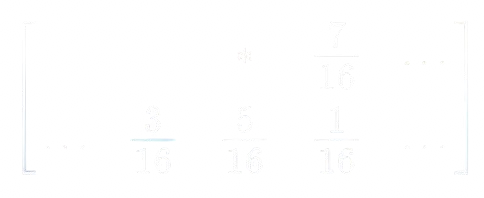
Image from Wikipedia | the FS diffusion coefficients
-> let’s say we have a pixel value in RGB format with R value = 207 and we round it to 255, so the quant error is 255 - 207 = 48.
-> now according to the coefficients shown previously, the pixel to the right will be transformed to newValue = oldValue + error * 7/16, if the value of that pixel was 150, it will change to 150 + 48 * 7/16 = 171.
In short, for every pixel:
- round off value to
closestValue. - calculate
error = closestValue - value. - for each of the neighbours,
newValue = oldValue + error * itsCorrespondingFraction.

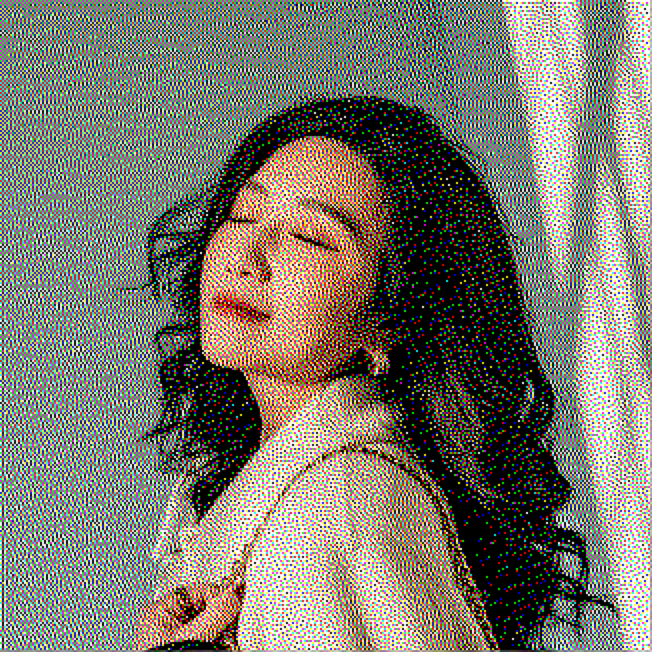
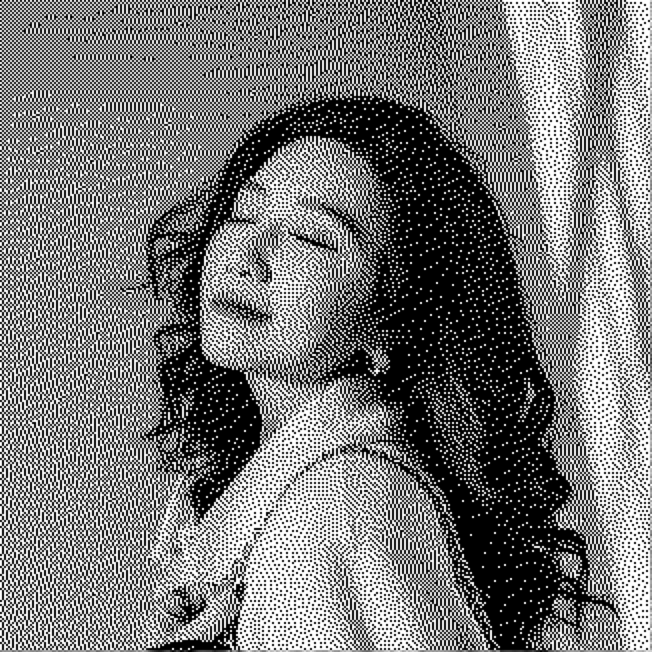
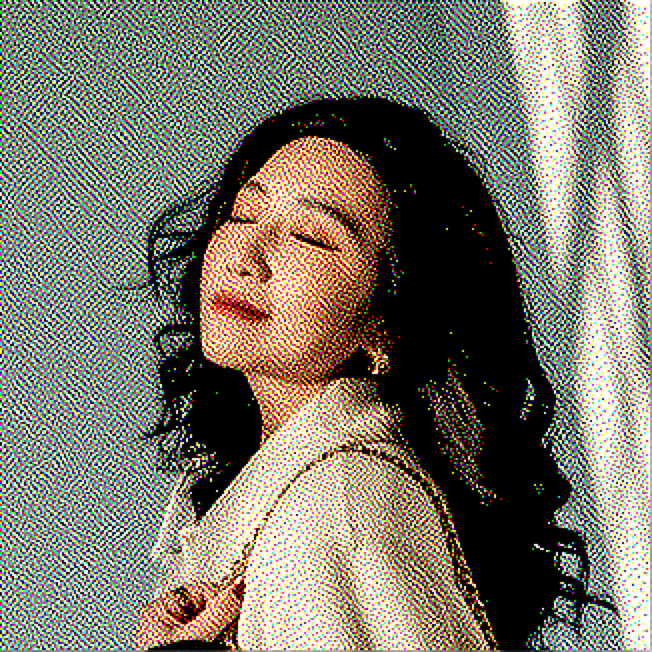
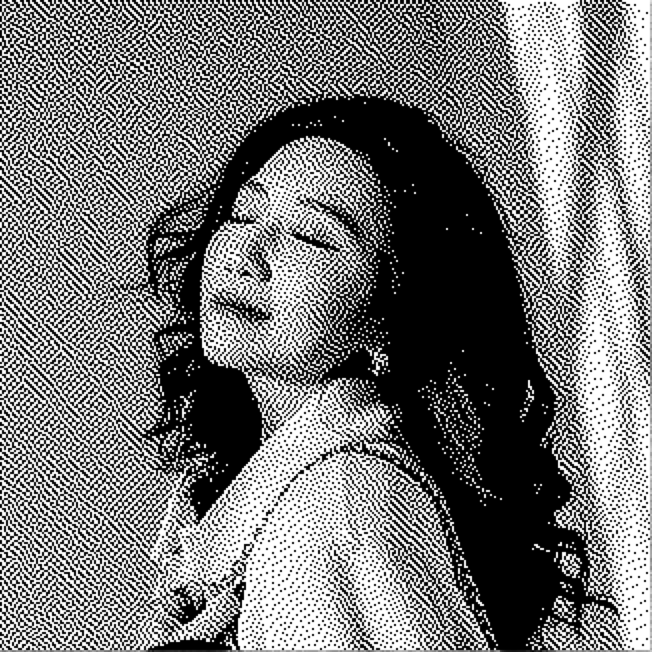
Original Image from Unsplash (first). Dithered with Floyd-Steinberg(second), and Grayscaled + Dithered with Floyd-Steinberg (third).
We can decide what value to round off to and how many color values we want during quantizing, for e.g. if we wanted n = 4 values in our dithered image -0, 85, 170, 255. In this case, a value of207will be rounded off to the closest one i.e.170.
Note:RGB values range from 0 to 255. In grayscale images, a pixel’s R, G and B values are all the same, so (207, 207, 207) will convert to (255, 255, 255) which is also grayscale.
It means forn = 2possible values,0 and 255:
For a grayscale image -> 2 (or n) possible outputs i.e. (0, 0, 0) or (255, 255, 255).
For a non-grayscale image -> more than 2 (or n) possible outputs e.g. (255, 255, 0), (255, 0, 255), (0, 255, 0), (255, 255, 255) and so on.
Also, note that whenever I mention “value” I am referring to one of R/G/B values, which is also referred to as brightness.
Atkinson Algorithm
Atkinson dithering is a variant of Floyd–Steinberg dithering designed by Bill Atkinson at Apple Computer, and used in the original Macintosh computer.
It pushes the quant error to neighbouring six pixels like shown below:
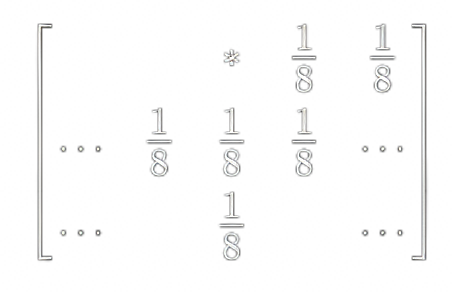
Image from Wikipedia | the Atkinson diffusion coefficients
Unlike Floyd–Steinberg dithering, only 3⁄4 of the error is diffused outward. This leads to a more localized dither, at the cost of lower performance on near-white and near-black areas, but the increase in contrast on those areas may be regarded as more visually desirable for some purposes. from Wikipedia
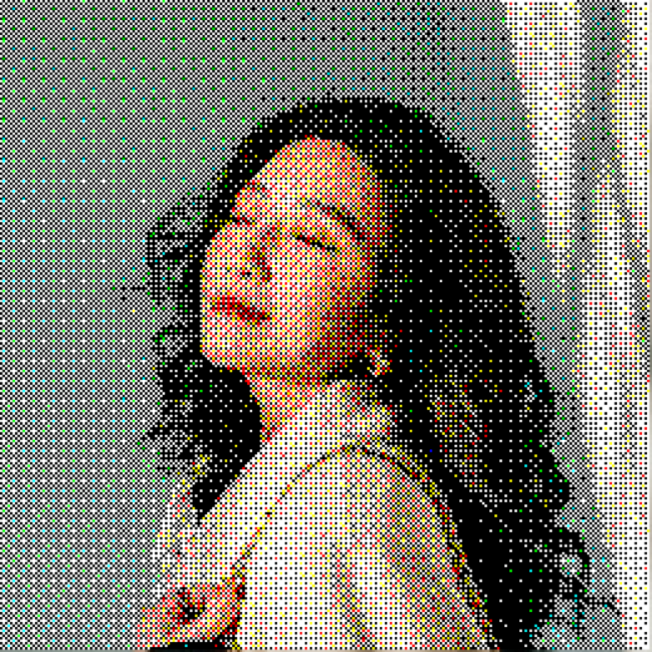
Original Image (first). Dithered with Atkinson Algorithm(second), and Grayscaled + Dithered with Atkinson Algorithm (third).
As you can see in the above images, the output looks more uniform and cleaner as compared to Floyd-Steinberg.
Non-Error Diffusion Algorithms
One of the main type of algorithms here are ordered algorithms. We apply a fixed, repeating pattern (an “order”) to decide how to threshold each pixel. We round off the pixel values based on if it’s greater or smaller than a dynamic threshold. Some Examples:
Bayer Ordered Algorithm
Ordered algorithms usually utilize a threshold matrix to create a repeating pixelated, grid-like patterns. Think of it as starting with a matrix of values and repeating it across the entire image, like floor tiles.
// 4 x 4 threshold matrix

const thresholdMat = [
    [  0,  8,  2, 10 ],
    [ 12,  4, 14,  6 ],
    [  3, 11,  1,  9 ],
    [ 15,  7, 13,  5 ]
  ];
-> A matrix is defined, which is usually a square matrix with N x N dimensions and values from 0 to N * N - 1. This matrix is also called Bayer matrix when N is a power of 2.
-> While traversing each pixel, we can get the corresponding matrix value by taking modulo of the pixel indices (x and y) w.r.t. N.
-> Once we get the value, we divide by N*N to get a value between 0 and 1 and multiply it with 255.

-> Now we have a threshold value to which we compare the original pixel value and decide to turn the pixel on or off
-> For e.g. if the threshold is 127.5 and the pixel value is 130, we can turn it “on” (since 130 > 127.5) by setting it to a value like 255.
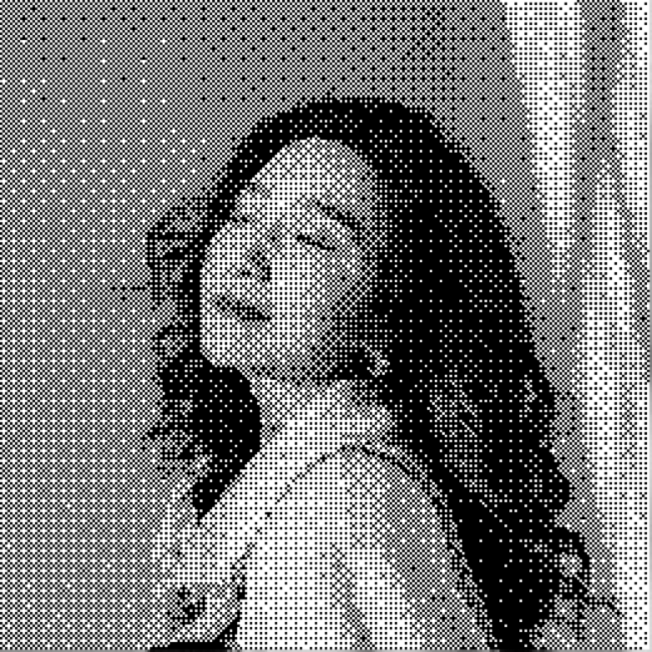
Original Image (first). Dithered with Bayer(second), and Grayscaled + Dithered with Bayer (third).
Halftone
This algorithm doesn’t use a matrix, but can still be termed as an ordered algorithm since it generates similar, repeating patterns — circles.
-> To create a basic halftone effect, we can take a grid or cell of size N similar to Bayer, but instead of comparing pixels to some matrix, we just convert it to grayscale and take it’s value (or brightness).
-> We take the average brightness of the cell, which will decide the size of the black dot at the center of the cell. Brighter the cell, smaller the circle.
-> Since we considered a grayscale version of the image here, the resulting image will always be just black and white.

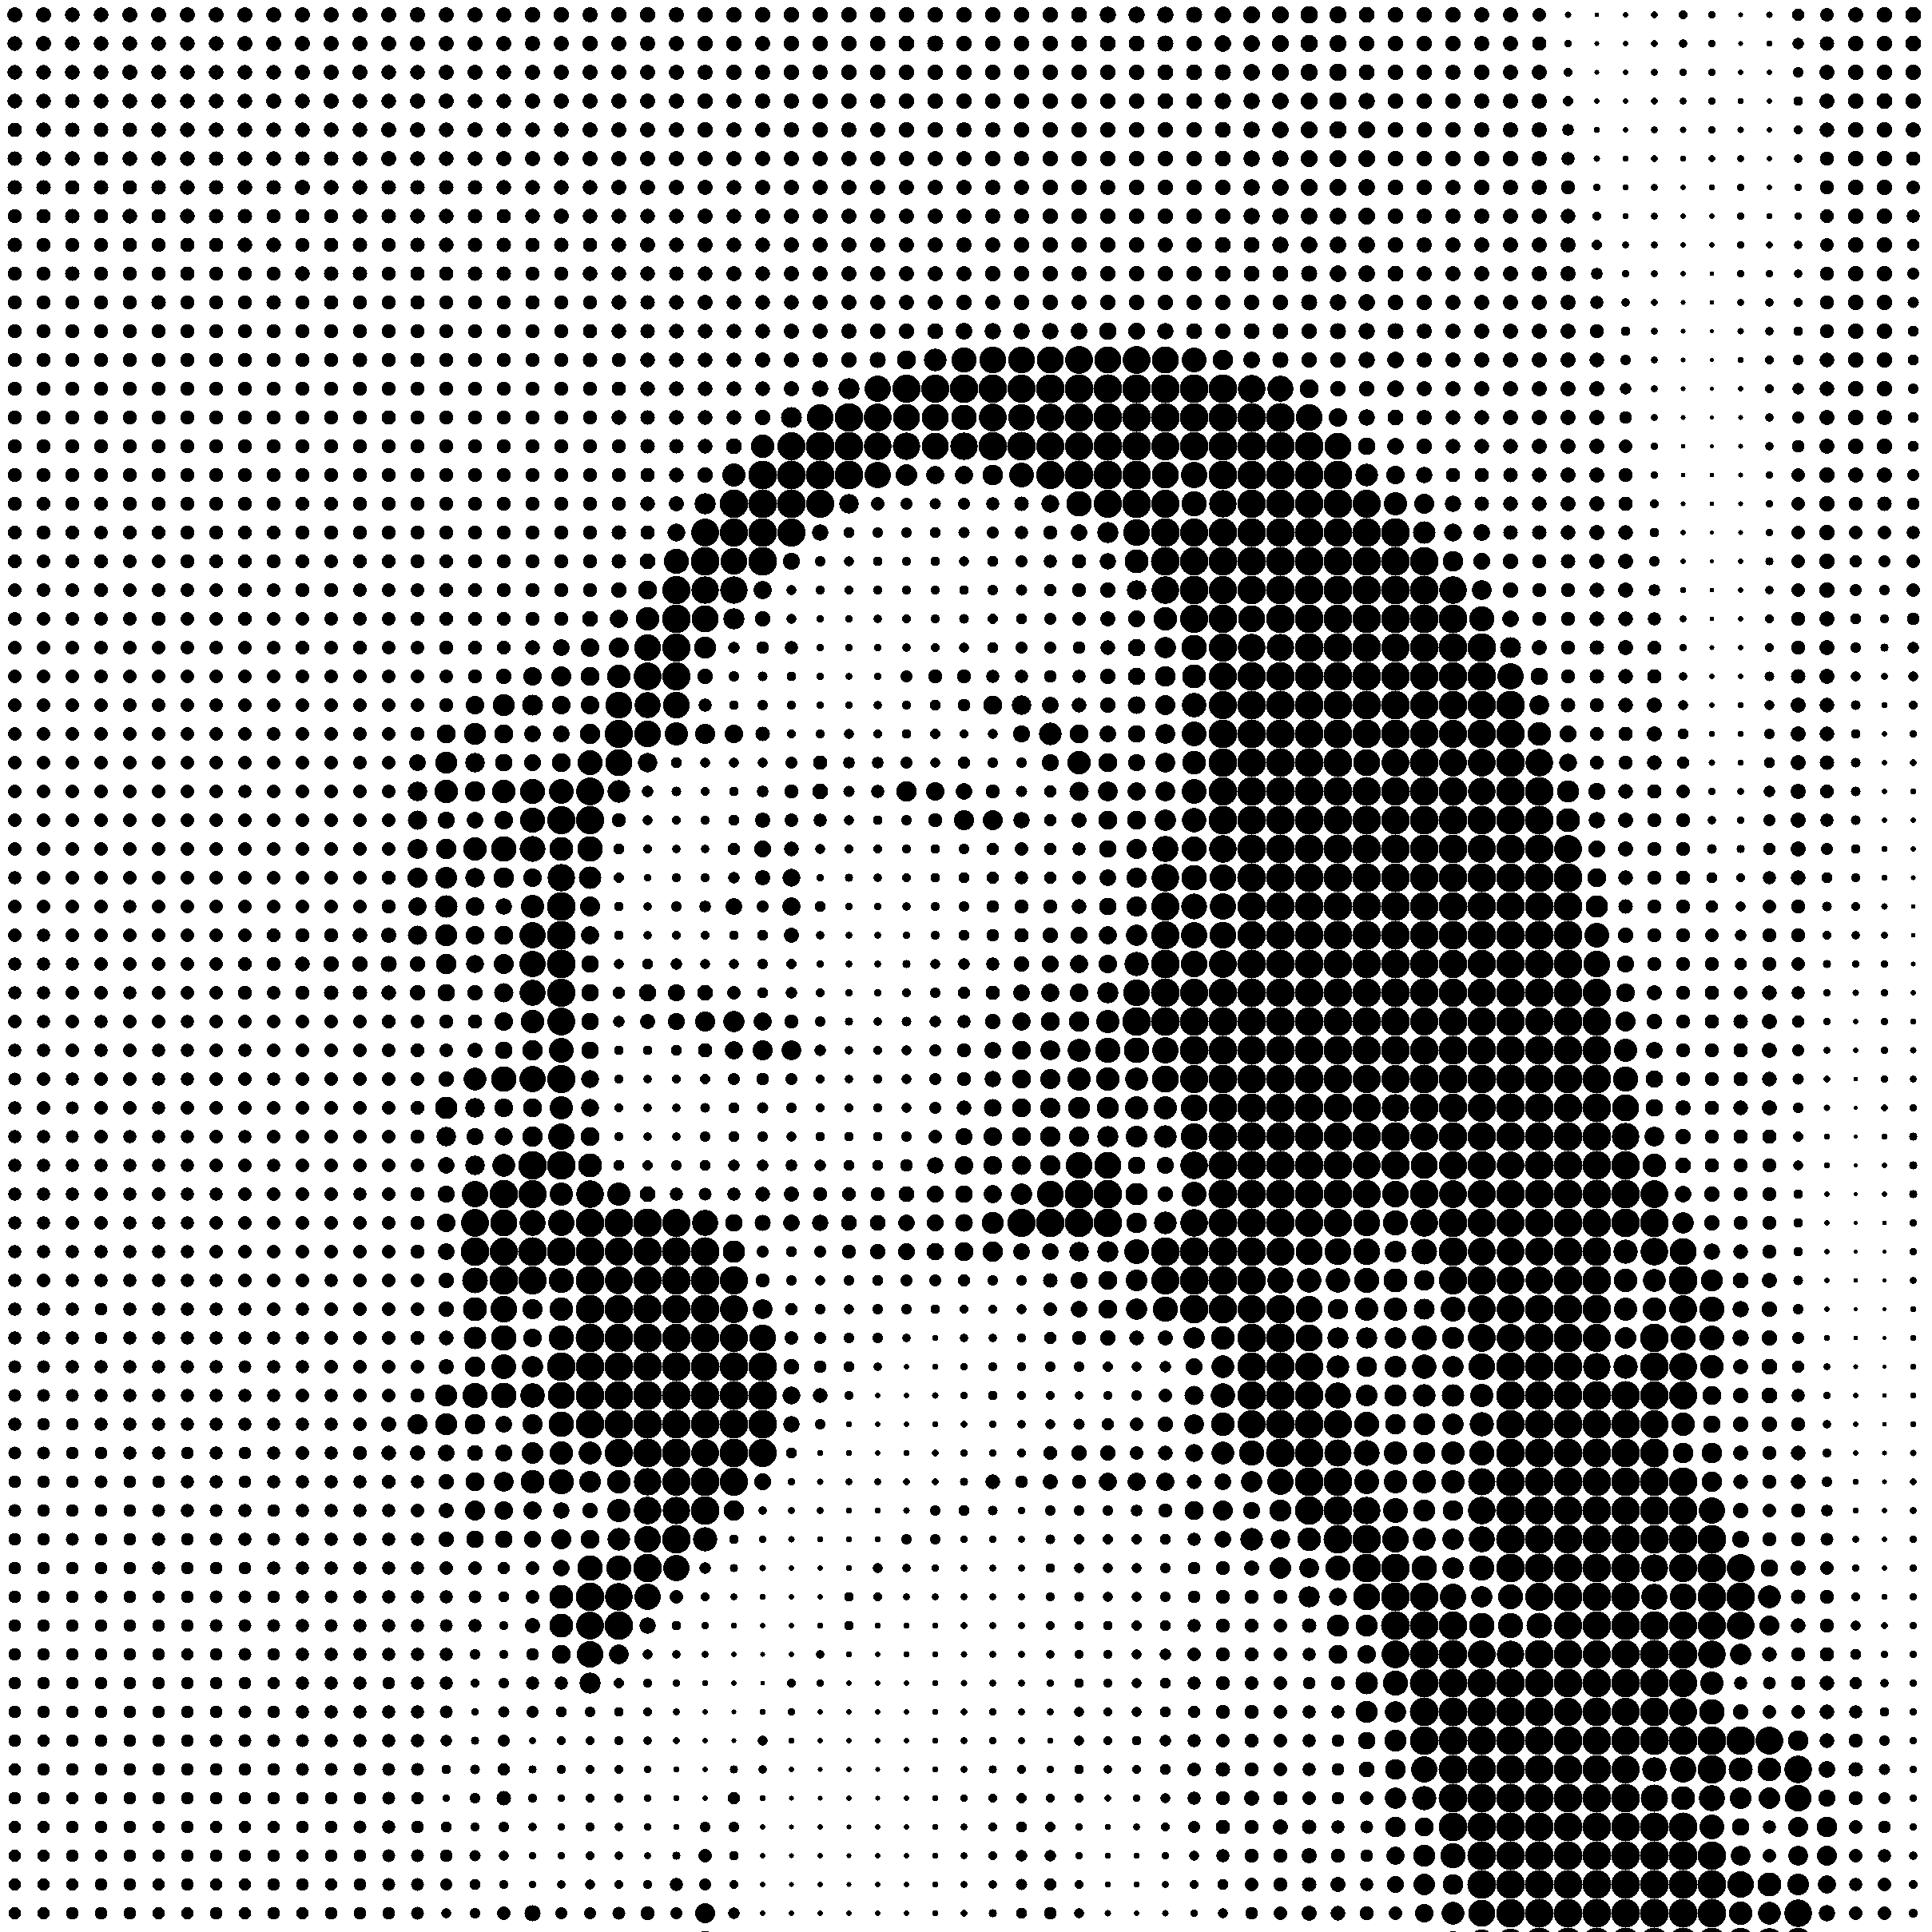

Original Image (first). Dithered with Halftone (second) and Dithered with halftone + lowered quality (third).
There are more methods like threshold and random dithering, and plenty more interesting algorithms out there, which I encourage you to poke around yourself.
You can check out Ditherplay (source code here), a project I had initially built for fun, to help apply Dithering effects along with a ton of Controls.
Conclusion
Dithering is a smart way to make images look better when you have limited colors. Instead of showing harsh steps between shades, it adds patterns that trick our eyes into seeing smooth detail.
I highly recommend you to explore Dithering more and just play around, you might be surprised by how much personality a few pixels can add :)